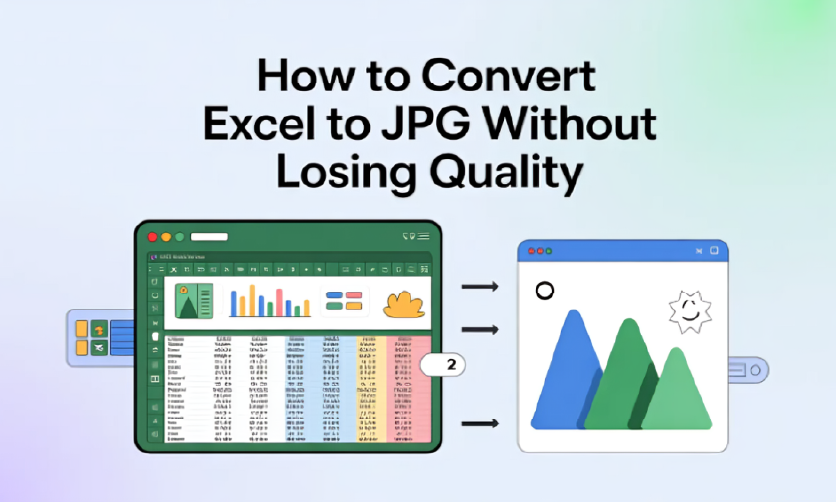
How to Convert Excel to JPG Without Losing Quality
Excel files mostly contain important data, including financial reports, performance dashboards, analytical charts, etc. Professionals often need to share them quickly. However, sending the Excel sheet isn’t always practical. Recipients may not have Excel installed. Formatting may shift across devices. The file may be too large for web platforms.
In such cases, Excel to JPG conversion becomes an ideal option. It can solve all these problems. A JPG image is lightweight and universally supported. It is also easy to embed in presentations, emails, websites, and reports while keeping the visual layout intact. Yet this convenience creates a technical challenge.
During conversion, the spreadsheet is rasterized. The compression algorithms reduce visual data to decrease file size. As a result, small fonts may become blurry, thin borders may fade, and detailed charts can lose their sharpness. This especially happens when resolution or scaling settings are not handled correctly.
The good news is that this quality loss is avoidable. With the right approach and suitable methods, you can convert Excel to JPG while preserving quality. In this article, I’ll help you learn exactly how to do it. So, stay with me!
Table of Contents
Why Quality is Lost During Conversion?
Before jumping into the methods that help with Excel to JPG conversion, it’s important to understand the reason behind image quality loss. The issue usually does not come from Excel itself. In fact, it comes during the process of conversion.
Common factors for quality loss often include:
- Low export resolution (DPI): It reduces pixel density and makes text blurry.
- Image compression: It removes visual data to reduce file size.
- Resizing after export: It stretches pixels and creates jagged edges.
- Screenshot-based methods: They are limited by screen resolution.
- Improper scaling of charts and tables: It distorts the layout and sharpness.
When Excel content is not exported correctly, text may appear blurry, lines may look jagged, and charts may lose clarity.

Best Methods for Excel to JPG Conversion
Once the reasons for quality loss are understood, the next step is choosing the right method. I have come up with two of the best conversion methods. Both of them become practical during different circumstances. Let’s explore them step by step
1. Using Excel’s Built-in “Copy as Picture” Feature
This method can be directly carried out in MS Excel. Microsoft offers a built-in Excel feature named “Copy as Picture”. It allows you to export selected data from a spreadsheet as an image while giving control over the quality. To correctly convert Excel to JPG using this method, follow these steps:
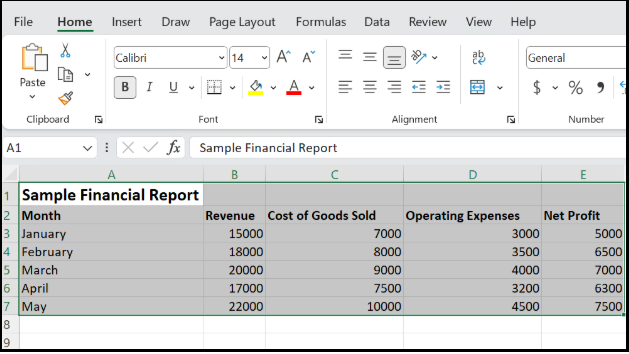
i) Open your spreadsheet in MS Excel. Select the cells, table, or chart you want to convert.
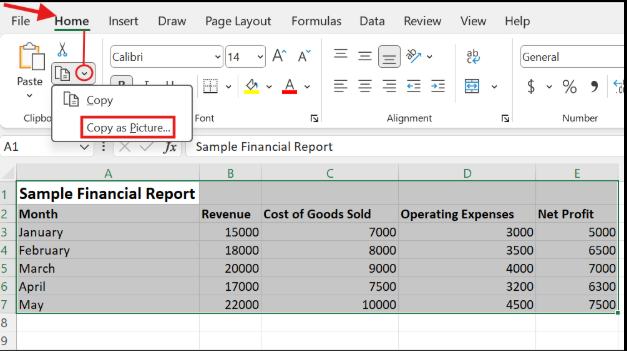
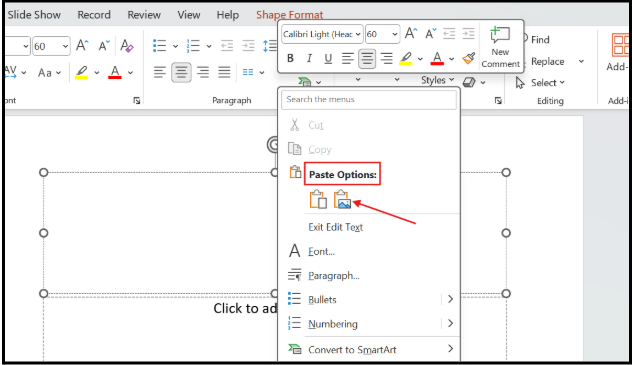
ii) Once selected, navigate to the “Home” tab at the header and click on the ‘small arrow’ beside the copy button. From there, choose the “Copy as Picture”.
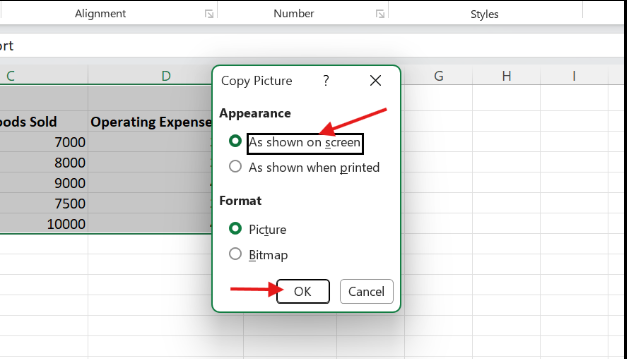
iii) As soon as you click it, a dialog box will appear on the screen. From there, choose the option “As shown on screen” and press the “OK” button. This is the most important step in the conversion process to get the best quality possible.
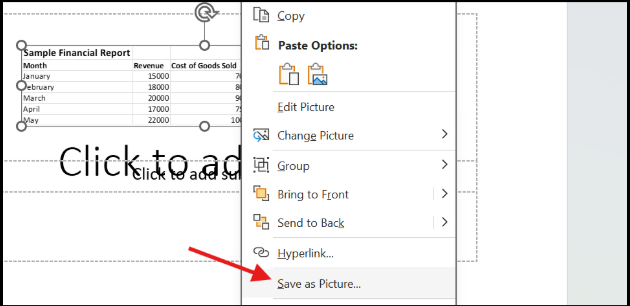
iv) Then, paste it into a suitable setting like PowerPoint as shown in the following screenshot.
v) Once pasted into the PowerPoint, right-click on it and choose “Save as Picture”
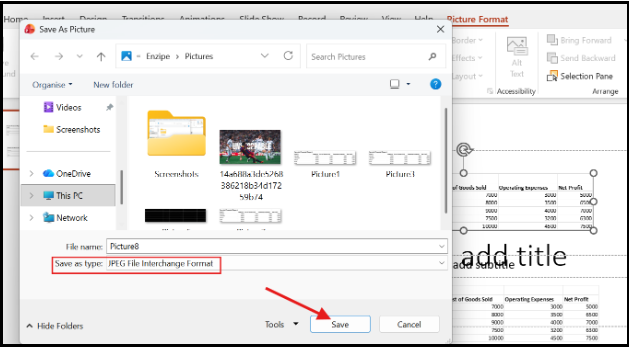
vi) On clicking it, a window will appear. From there, select the JPG as the file type and press “Save”. The image will be successfully saved on your device as a JPG.
This method is best when:
- You don’t have access to the internet
- You need maximum formatting accuracy
- You are working with sensitive or confidential data
- You only need a specific section and not the whole Excel file
Few insightful articles on Excel to improve your knowledge:
2. Using a Dedicated Excel to JPG Converter
The second method involves using a dedicated online tool that can help convert Excel to JPG easily. There are multiple tools available online, and choosing the right one is key to getting accurate results without quality loss. I chose one such tool to demonstrate the process. The steps are given as follows.
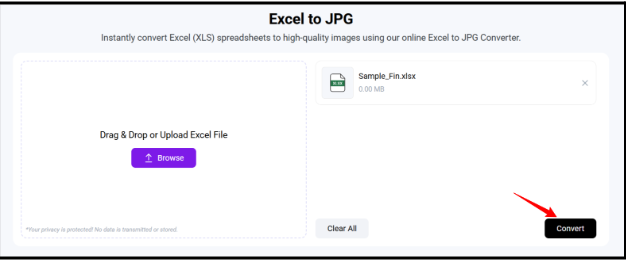
i) Access the tool, and upload the Excel file by clicking on the “Browse” button or through the ‘Drag and Drop’ option.
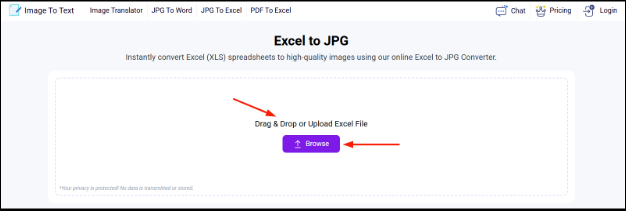
(Tool Link: https://www.imagetotext.info/excel-to-jpg)
ii) Once uploaded, simply click on the “Convert” button at the bottom right of the screen.
iii) As soon as you press the Convert button, the tool converts your Excel file into a JPG in the blink of an eye. Simply, click on the “Download” button to save the JPG.
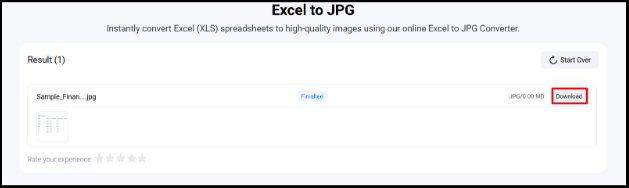
That’s how simple and quick it is to convert an Excel to JPG with the help of a dedicated online tool.
This method is best when:
- You need to convert quickly
- You need a bulk conversion
- You don’t have Microsoft Excel installed
Final Thoughts
Converting Excel to JPG without losing quality is achievable when you understand the process. By managing resolution, scaling, and export settings carefully, you can preserve the quality. The text stays sharp, and lines remain clear in the final image.
Both methods discussed above work effectively. You can choose one depending on your specific needs. However, if you prefer a quicker and more straightforward approach, the online tool method offers added convenience. With either method, the output quality remains consistent.